Brother Se400; Checking out the embroidery function

About an hour ago I got to play around with my Brother SE400’s embroidery function. The sewing machine arrived on Monday.

Brother SE400 sewing & Embroidery Machine
Brother SE400 Sewing & Embroidery Machine


I unpacked it the same day it arrived, just to see if I received all the parts, but I didn’t actually test it out until yesterday and then I only tested the sewing function. I won’t be using this for sewing, I purchased this machine solely for it’s embroidery feature. Today, I had a little time and so I finally tested out the embroidery feature. I stuck with simple designs and did them all on ‘scrap material’.
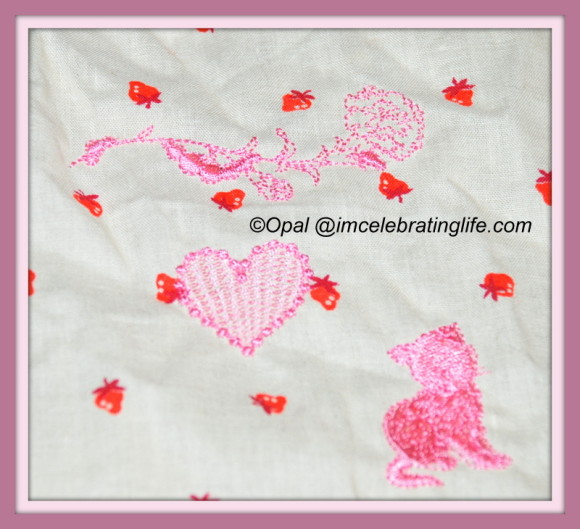
Cute designs embroidered with my Brother SE400


In hindsight, I should swapped out embroidery threads, especially for the kitty so you could see the contrast (and it’s eyes) but I was basically just checking out how it embroiders. The SE400 stops sewing so you can swap out the embroidery thread for another color. I didn’t swap, I just started it again to keep the machine sewing with the same color.
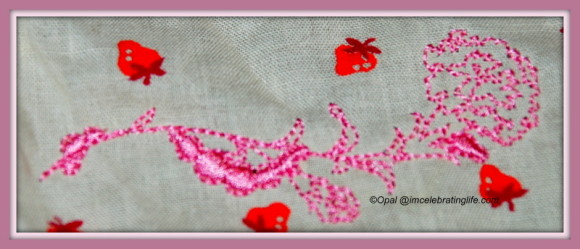
I'm really loving this embroidery thread.
I’m really loving this embroidery thread.


Also I should have used plain fabric but I told my daughter to grab some scrap fabric and she choose this. Currently I’m a newbie with machine embroidery… and it’s a strange feeling… I’ve been sewing for over 30 years, hand embroidery for almost as long, but this is my first time embroidering with an embroidery machine.

Wrong side of machine embroidered work
Wrong side of machine embroidery. I took this picture before I snipped the loose threads and removed the stabilizer – shiny clear stuff you see. Stabilizer is needed for machine embroidery.


Naturally you’ll need to use stabilizer on the back of your fabric… depending on the fabric you choose you might have to add a lightweight stabilizer to the front of the fabric also. The embroidery function is so easy, choose the design you like unplug the foot pedal and the machine does everything for you.

Once I become familiar with the Brother SE400’s embroidery function, I’ll start doing more elaborate designs. My initial reaction is that I like the machine. It’s runs quiet, and I love the hands off embroidery features… the self threading feature along with the automatic thread cutting are nice bonuses also.

In other news….

Of course I’m still knitting. Currently, I’m working on a pair of mittens for myself and I’m knitting the mittens two at a time!

Embroidery software is new to me…

In preparation for my upcoming ‘crafty tech’ purchase… yes, I know it’s a embroidery sewing machine, but since it’s computerized I think it’s safe to say it classifies as ‘tech equipment’, right?

I’ve started checking out embroidery software. It made no sense to do it before, since the software packages I’ve been looking at also offer free trials and how could I test the software without the machine? My top priority is looking for a program that converts regular photos such as *.jpg, *bmp, *.png,  *.gif, *.wmf, *.emf, and other unsupported formats into a ‘workspace’.

From there I could convert it to *.pes which is the file format for Brother sewing machines. And while I looked at a few programs that did this, I wasn’t about to pay $400+if it’s something I don’t want to invest a lot of time with. I’m choosing Sew Art Embroidery Auto Digitiser. It does what I’m looking for and it only costs $75.

Features of SewArt (an auto-digitizer for embroidery files)

  • Reads raster or vector format images (supported input formats include *.bmp, *.png, *.jpg, *.gif, *.wmf, and *.emf)
  • Allows images in other (unsupported) file formats to be pasted into the SewArt workspace
  • Converts images to high-quality embroidery files for sewing
  • Supports output embroidery file formats including Brother (c) *.pes, Janome (c) *.jef, and Singer (c) *.xxx (these may be converted by SewWhat-Pro, or other embroidery editors, to a  much larger variety of embroidery file formats compatible with most home and commercial machines)
  • Contains tools for converting images into color-reduced, smoothed images suitable for digitizing
  • Includes a variety of pattern fills which can be applied to sew individual regions of the image
  • Supports both auto-digitizing and manual digitizing options to give substantial user control over the digitizing process
World of Warcraft Aggra
World of Warcraft: Aggra


How cool is that? Now that means I can (hopefully) convert my favorite World of Warcraft played character into an embroidery file. Well, I don’t actually play Aggra in WoW but I do (mainly play) female Orcs. Of course there are many other reasons I’d love to convert pictures to an embroidery file format…

I’ll definitely play around with it, before purchasing the full version and who knows as I advance with machine embroidery my needs might require that I purchase something more pricey.  At that time, I’ll start looking at other choices.

Guess what? My sewing machine is already in Maryland! It arrived yesterday the day I placed the order. Which means the warehouse where some of Amazon’s products are kept is close.  Although it’s here in Maryland, UPS has my package arriving to me on Monday so I’ll have to wait a bit longer. Unfortunately I won’t have time to play with it on Monday since I have a board meeting to attend that evening.

I’ve been frequenting machine embroidery forums, reading lots of information and I think I’m a well educated newb, hopefully that will be extremely helpful when my embroidery sewing machine arrives.

Designing a hook and needle case; sewing

This evening, after my tiny crochet pattern test is completed, I believe I’ll take some time to make a carrying case for my hooks and needles.

Reasons I’m interested in Knit Picks Options interchangeable knitting needles

I admit, the main reason for me to get active in making a case is my recent purchase from Knit Picks. Yesterday, I received an email stating that my Knit Picks interchangeable nickel plated circular knitting needles had shipped! I’m excited for a few reasons…

  1. Interchangeable circular knitting needles are appealing, since I can simply “add on” tips or cable length depending on my needs.
  2. I won’t have to keep going to Michaels to purchase yet another circular needle. I have plenty of those, and will continue to use them. Always nice to have backups… you know?
  3. Since Knit Picks cable lengths go up 60,” I’ll be able to start on some of my larger knitting projects, such as the knitted Coraline sweater for my daughter, the knitted Guernsey sweater for my father, and eventually I’ll knit the Sylvi coat for myself. I’ve always disliked working larger projects on straight knitting needles, since the excess weight as the project grew had no where to go, It just hung at the end of the straight knitting needles. With circulars, due to the long cable used for larger projects, the weight falls into your lap.

Judging by the tracking number provided I should receive them next week. And while a carrying case is provided with the needles, I do believe I’ll design and sew one to hold all my hooks and needles.

I have a few designs floating around in my head, and so I’ll sketch them out on paper. Since I also sew, I have plenty of fabric choices to choose from, and while I have a few ideas in my mind, I haven’t narrowed it down… yet.

At the halfway mark; crochet and knitted bag for daughter’s teacher

Today, I’m a bit too busy to post photos and link to other works in progresses

But I’m moving along with the crocheted and knitted bag I’m making for my daughter’s third grade teacher.

Thus far, I’d say I’ve put about ten hours into crocheting this bag. Because of the stitching used, half-double crochet, it is extremely durable.

If you’ve been following my recent posts, the pattern I linked to was obviously a crocheted bag. But that’s just a generic pattern guide. I referenced it, so I could get a general idea about the bags height, width, and base.

I’m almost halfway through crocheting the bag, after that time I have a few things I’ll be knitting, which won’t take long at all. The final step in the process will be sewing; yes, I’m adding that into the mix too, and perhaps a bit of embroidery.

I decided not to dye the crocheted bag…

This is my first time working with Sugar’n Cream yarn . Also, I haven’t used  mulberry as a dye in years, I don’t want any unpleasant surprises.  However, I will be introducing some earth tone colors in the form of trim, and it’ll make an appearance with a few other items also. 

There is a possibility that this handcrafted bag will be completed by tomorrow, but I’m planning on giving it to her teacher on Friday, which is the last day of school…