Hiya Hiya knitting needles, Malabrigo Rios, and the knitting the Ferramenta Hat

I finally got around to casting on for the intricate Ferramenta Hat, but first I had to rewind the lovely skeins of Malabrigo Rios yarn in Pedras. I’m so glad I did, the first skein was fine, but the last skein was tangled. I didn’t discover that until I started rewinding. After about 40 minutes, I was able to remove all the tangles without cutting the yarn!

Malabrigo Rios in Pedras_3
I’m loving this yarn even more after it was rewound

I put them side by side in two neat yarn cakes, aren’t they pretty?

Malabrigo Rios in Pedras_2
Ready to start knitting, all I need are my Hiya Hiya sharps!

The next step was to retrieve the pattern, which I did…

Ferramenta Knitted hat beginning_casting on_1
Casting on the stitches, don’t bother me while I’m counting!

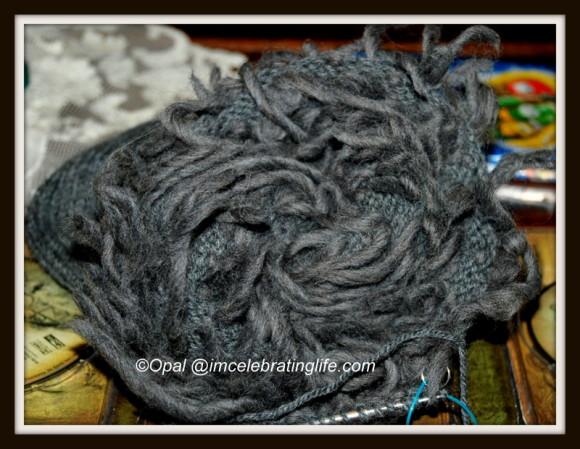
and then start casting on, yep did that too! The pattern calls for size 6 knitting needles to cast on, but I after reading a few comments by people who’d knitted this hat, I decided to drop down a few more sizes and ended at a size 4. I like the brim to have a snug fit.  I pulled out my Hiya Hiya sharps and started knitting.

Ferramenta Knitted hat beginning_3
Five rows of seed stitch, four more to do…

Since I did not like the rolled hat brim that the pattern suggested, I decided that I would see how I liked using moss stitch, and I must say that I’m thrilled with the choice, I think it looks great and will fit with the intricate cables designs of this hat. Once I’m finished the moss stitch section, I’ll swap out my Hiya Hiya sharp interchangeable for a larger size or two. We’ll see….

Soon to be on my Hiya Hiya needles; malabrigo rios and a ferramenta knitted hat

While my loom, 32″ Kromski Harp, is taking a much needed break, I’ll be picking up my much loved Hiya Hiya needles so I can knit this adorable Ferramenta Knitted hat. It’s part of a barter I set up with a friend in exchange for growing my own mushrooms.

Ferramenta hat
Ferramenta knitted hat by Nina Machlin Dayton

Isn’t it gorgeous? I’m in love with this cabled design!

Here’s the description…

Reminiscent of the complex and decorative ironwork popularized by the Italian immigrant iron workers in cities like New York in the late eighteenth and early nineteenth centuries, Ferramenta (Italian for ironwork or ironmonger) is knit bottom up, in the round, and used twisted stitches and small cables to evoke the complex patterns that these workers incorporated into their art.

This hat can be worn as a slouch hat, or blocked flat into a beret/tam shape, making it suitable for men and women.

Pattern has written and charted instructions.

I gave my friend a list of cabled knitted hats that they could chose from, and they picked the above hat. It’s the one I would have chosen too. They’d already chosen the yarn, super squishy Malabrigo Rios in Pedras!  The cost of Ferramenta knitted hat pattern is $5.00,  and it can be found on Ravelry. The weaving designer, is Nina Machlin Dayton, and her website can be found at Nina Knits, but she hasn’t posted there in a few years.

Malabrigo Rios Piedras
Malabrigo Rios in Pedras; this yarn is so soft and it’s a washable wool!

I’m really looking forward to working with cables again. I love knitted cables, and am looking to become reacquainted with twisted stitches.

Knitting videos

I think, the  videos I’ve included below, are helpful for those new to these two stitches. The instructors speak clearly and the video shots are great so you can actually see what they are doing.

How to knit a cable stitch


How to knit a twisted stitch


Photo Source:

  1. Ravelry: Ferramenta hat

Cold weather, warm mittens; knitting two at a time

Oh the weather outside is frightful
But the fire is so delightful
And since we’ve got no place to go
Let It Snow! Let It Snow! Let It Snow!!

The past few days have been very chilly in Maryland, some days our temperature didn’t climb over 10 F. With weather like that you want to stay warm when you brave the elements outside.

Of course I went down a mental checklist to see if there is anything that was needed and the only thing that popped into my brain was mittens for my daughter! Well… that’s an easy fix. I told my daughter to choose yarn that she liked and after she made her selection I casted on 40 stitches. Ever since I switched over to circular knitting needles any project that requires a pair is done two at a time.

The mittens I’m knitting will be an upgrade for my daughter since they replace the mittens I knitted (last year) for my rapidly growing daughter. The girl is ten years old and is only two inches shorter than me. Also, she is now wearing a 7.5 shoe. She’s a beautiful, tall, slim and kindhearted girl. My daughter rarely asks for me to knit her anything. She can see the time it takes to create many of the items I make, but I do it for her anyway because she’s worth the time.

Knitting two at a time mittens_1.1.4.14

These mittens have knitted up fairly quickly and I must say it’s going much faster since I’m doing them two at a time. I don’t have to worry about the gauge on one being possibly different, since they are being done at the same time. Also, if the inspiration bug hits and I decide to add different stitches as I go, I don’t have to remember what row that happened since I’m knitting both mittens at the same time.

If you want to know how knitting two at a time is done on circular needles, check out the above video by Liat Gat.


Knitting: Ann Yamamoto has free shawl designs available on Ravelry

Aren’t these shawls lovely?

Knitting_Anna Yamamoto_shawl design_ Green the whole year round
Anna Yamamoto: shawl design; Green the whole year round
Knitting_Anna Yamamoto_shawl design_Longsuffering
Anna Yamamoto: shawl design; Longsuffering
Knitting_Anna Yamamoto_Seashells
Anna Yamamoto: shawl design; Seashells on the Sand
OLYMPUS DIGITAL CAMERA
Anna Yamamoto: shawl design; Bonsai


My favorite is Bonsai! Oh by the way, clicking on each picture will take you directly to the page where you can download the pattern.

This past weekend, Curls & Q’s clued her readers into these delightful knitting patterns. Do you want to know something? They’re free. Q is  quite the enabler! I’ve purchased plenty of crochet and knitting patterns via the Ravelry site and I’ve picked up a few free patterns also. Naturally, I’ve already snapped up these patterns and stored them in my library on Ravelry. I’m looking forward to seeing more designs (priced or free) by Anna Yamamoto the knitting designer who created these fabulous pieces.

I’m nudging the super talented Nicky, so she can take advantage of these lovely designs also.

Adventures in Knitting: Lined Thrummed hat

I finished the lined thrummed hat that knitted for my father.

This is the hat that I made to replace the hat I’d knitted for him last Christmas Eve. You can find more on why I waited until Christmas Eve at that link. My father loves that hat and it’s starting to show a lot of wear. I thought knitting this hat would be a suitable upgrade. It took a bit longer than some of the hats I’ve knitted in the past.

Knitted lined thrummed hat_1.12.21.13
Knitting: Thrummed lined hat, you can see some of the roving yarn peeking out of of the hats brim

That’s mostly due to the fact that it was lined (which you might as well say is knitting another hat) and I added thrumming to the hat also.

Knitted lined thrummed hat_2.12.21.13
Look at all that roving yarn

This hat is made out of wool and it is squishably soft and warm. The roving yarn, which is used for thrumming, can’t be seen once that hat was completed since it’s sandwiched between the knitted hat exterior and the hats lining.

Knitted lined thrummed hat_1.12.22.13

This hat was boxed and set aside for Christmas wrapping. I’m thinking about weaving my father a scarf, but that might just be wishful thinking on my part. We’ll see, how much time I have to complete that.

I included a video about thrumming when I first wrote about this project and I’m including it again in this post.

Knitting: How to Thrum

The past few weeks have been a bit cold in Maryland. We’ve already had snow twice, nothing major about 8″ the first time and perhaps 4″ a few days later. Since I enjoy knitting my daughter and I have been well prepared wrapped up in our knitted hats, gloves and cowls.

I did notice that my fathers favorite hat, the one that I knitted on Christmas Eve 2013, could use an upgrade! Since Maryland has been getting a lot of cold weather,  I’ve decided to knit him a lined thrummed hat. Today, I started on my father’s thrummed hat. Guess what? I’m almost finished knitting the lining, so it won’t be long before I start incorporating thrumming into the part of the hat that’s visible. I’ll have to purchase additional roving since I don’t think he would want red thrum on his grey hat. The roving yarn I purchase will most likely be black, blue or grey roving.

Incorporating “thrumming” into your knitting, makes an item incredibly warm since you’re attaching bits of fiber into your knitted cloth to increase the garments warmth. This technique is mainly seen in mittens and hats.

For those unfamiliar with the technique, I’ve included a video so you can understand how this knitting process is done. Later this week, I’ll be sure to post a few pictures of the thrummed hat that I’m knitting for my father. I’ll be sure to post pictures of the inside so you can see how dense and fluffy that becomes.